Manage your index from start to finish with BalfourTools.
During the portrait flowing process, BalfourTools automatically indexes the student names that appear in the portrait text frames. BalfourTools also provides tools for tagging additional names and subjects for indexing.
To access the Index tools, click the Shortcuts button in the Navigation Icons.
![]()
The Shortcuts Toolbar displays with the Index tools. Buttons from left to right are: the Mark Name for Index, Mark Subject for Index and Create Index.

Index Setup
Index generation depends on the presence of the following folders and files:
- An InDesign template, which is located in the project’s templates folder.
- An index folder at the root of the project folder, where the InDesign file is created.
- An index book file, which contains a list of spreads that map the page numbers to the index entries. This file is also created in the project’s index folder.
Generating Automatic Index Entries for Student Portraits
Student names imported from the portrait disk are
automatically tagged for indexing during the
portrait-page flowing process.
Manually Marking Name and Subject Index Entries
BalfourTools indexes only the portraits automatically, so any other names or subjects you want to include in the index must be marked manually. To mark an index entry:
- Open the spread in InDesign.
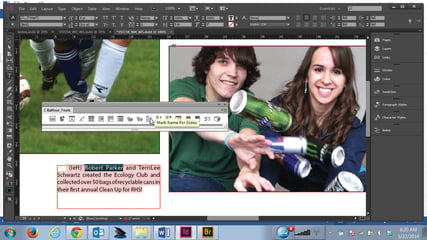
- Use the Type tool in InDesign to highlight the text you want to include as an index entry. If the entry is a name, click the Mark Name for Index button in the Shortcuts Toolbar. If the entry is a subject, use the Mark Subject for Index button. In this
image, a subject has been marked.
- Repeat this process as necessary and close all
open spreads.
You may mark multiple entries at once
using the Mark Entry buttons.
Running an Index
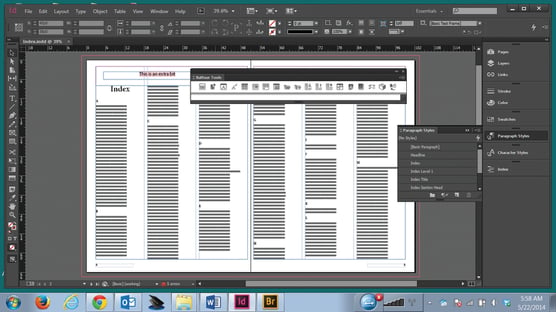
To create the index with both automatically and manually generated entries, click the Create Index button. The index is created inside an InDesign document derived from the index template.
After BalfourTools finishes compiling the index, the index and book file save automatically. Then the book file closes, and the index displays on your screen.

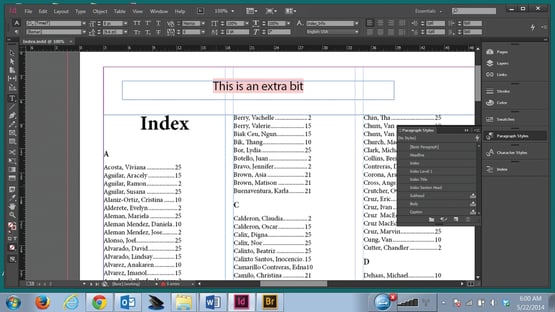
Here is a closer view of an index.

If you want to add more manual entries to the index, repeat the steps for marking names and subjects above, and then click the Create Index button again.
Formatting the Index
The index template has been formatted to automatically apply the appropriate typographic characteristics.
If additional formatting is needed, this can be applied to the final index document in InDesign. For easy editing, you may leave the index in one multi-page document until finalized.
