Automatically Tagging Existing Frames
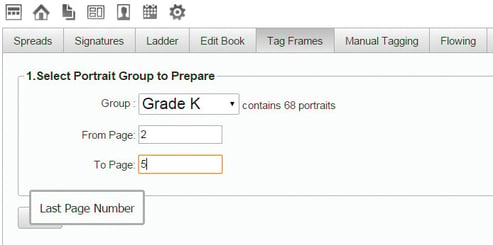
When you tag frames, you’re assigning portraits or groups of portraits to pages in your group. This is done in the Tag Frames tab. Select a portrait group to prepare from the Group pull-down menu.
Once you select the name of the group, enter the page range where the portraits in the group will be placed in the From Page and To Page fields. Click the Next
button to continue to the next screen.
- Set up portrait and caption frames.
To tag existing frames, click the Tag Existing Frames button.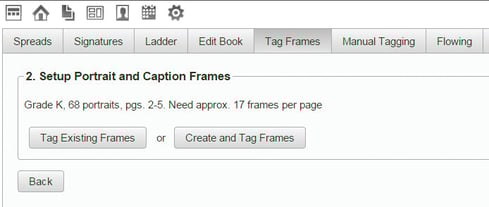
The Tag Portrait and Caption Frames screen displays. In InDesign, select one frame and one caption in your spread; then click the Start Tagging Frames button.
- Repeat Steps 1-2 until all groups have been prepared and all frames have been tagged.
Manually Tagging Existing Frames
For more complex layouts where automatic tagging is not suitable, portraits can be manually tagged. You can also make adjustments to a portrait section that has been auto-tagged.
To manually tag portraits, highlight the portrait and caption frames to be untagged and click Tag Selection.
To manually untag portraits, highlight the portrait and caption frames to be untagged and click Untag Selection.
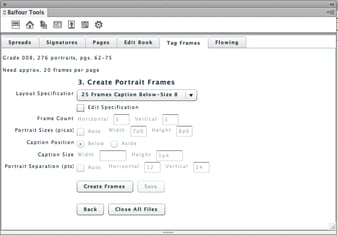
Creating and Tagging New Frames
You can also create your own frames by clicking the Create and Tag Frames button in the Setup Portrait and Caption Frames screen. In this case, select one of the Balfour templates from the Layout Specifications menu or set your own specifications, and click the Create Frames button.
To enable the flowing process to go smoothly, ensure all fonts used on portrait spreads are installed. If fonts are missing, InDesign creates a warning pop-up that interrupts the
auto-flowing process.
Flowing Portraits
Flowing inserts the prepared portraits and student names into the frames of your pages. To flow portraits:
- Click the Flowing tab. A list of the groups that have been tagged displays.
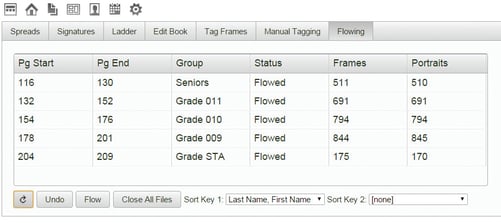
- Click on the row of the first group.
- If you want to change how the portraits sort while flowing, choose an option from the Sort Key 1 and/or Sort Key 2 menus. Last Name for Sort Key 1 and <None> for Sort Key 2 are the defaults.
- Click the Flow button. BalfourTools inserts the portraits and student names into the tagged spreads for the group. When the flowing is complete, a success
message displays. - Repeat steps 2-4 until all of the portraits have been flowed.
To retag pages, select the group and click the Re-tag button. This removes all photos or captions and re-tags
the page.
To start over for any page range, select the group and click the Undo button. All of the content for the page
range selected will be deleted.
CC2015 and Newer: Local Checkout
Local Checkout requires all spreads in flowing range to be opened, flowed and saved back to the network server. Once flowing is complete, saving to the server may take several minutes to finish based on network speed.