- Set the book name, size and page count.
Click the Setup icon in the Home view, then click the Setup Book tab. Enter the name of your yearbook in the Book Name field and the total Number of Pages and your yearbook size. The total page count should be in multiples of eight. Select your trim size based on
selected project folder size. Check box to add color swatches to load all Balfour colors.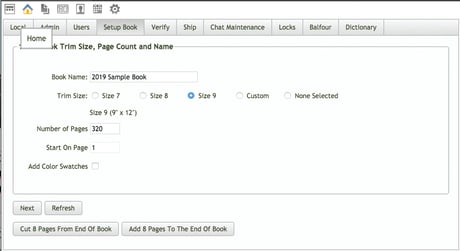
- Set spread templates by page range.
Click the Next button in the Setup Book tab to continue to the second step, assigning templates (page layouts) by page ranges. The page range must start on an even-numbered page and end on an odd-numbered page. To assign a template to a page, enter the start and end pages in the Page Range row. Click the Select Template button, and select the template you want. (Categorized templates are located in the project’s Templates folder.) Do not assign a template to leave pages blank so you can create your own layouts from scratch.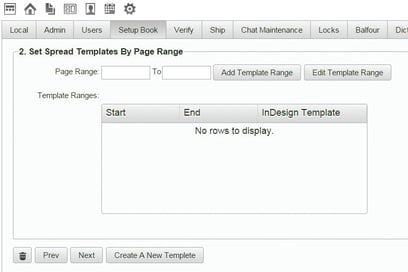
- Build your new yearbook.
Click Next in the Setup Book tab to continue to the third step, building your new yearbook. You will see a summary of the information you’ve entered: book name, total pages, book dimensions and template page ranges. If all is correct, click the Create Book Pages to build your yearbook. If you need to make changes, click the Prev button.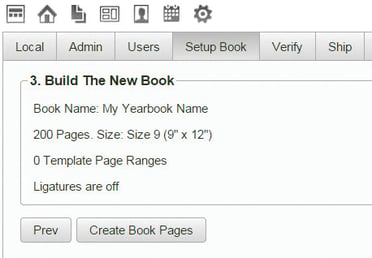
When your yearbook finishes building, a confirmation message displays with the
number of pages (spreads) created. - Check the book for errors.
To check that the book does not have any setup errors, click the Verify tab, then System Verify. This will report on the integrity of the setup, including script file locations and the presence of all required tiles.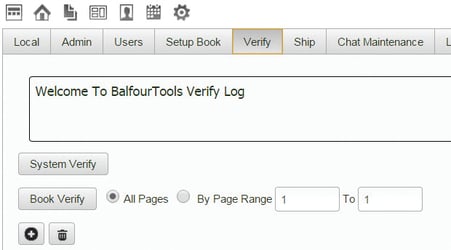
This screen also contains a Book Verify tab. Book Verify should be selected after pages have been designed, after flowing and/or after placing images from Content Manager. Before clicking Book Verify, specify the range of pages you wish to check. Book Verify checks for any errors, including trim size, page numbering, use of registration black instead of "Black" ink, mixes of RGB and CMYK color images that can cause transparency issues, proper bleeds, and images with resolution less than 300 dpi or stretched out of proportion.
To clear the information in the Verify tab, click the Delete button (trashcan icon) at the bottom of the tab.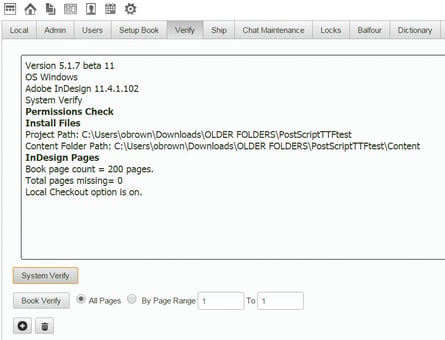
To save the System or Book Verify results as
a text file, click the + button to the right of the Book Verify button.
English