The Mainstage
On the Mainstage, Use the File ( ![]() )and Settings (
)and Settings ( ![]() ) menus to manage your project.
) menus to manage your project.
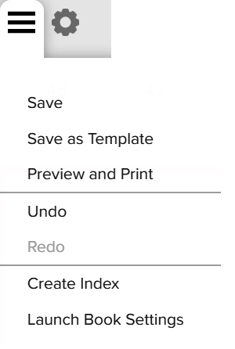
File Menu
- Save – saves work on an open spread. Keyboard shortcut: Ctrl/Cmd + S
- Save as Template - allows designers to save all the objects on a page for use on another spread
- Preview and Print - creates a pdf that can be viewed, saved or printed
- Undo – steps back from the last action completed on the spread until the beginning of the current session. Keyboard Shortcut: Ctrl/Cmd + Z
- Redo – steps forward from the last action undone in the current session. Keyboard Shortcut: Ctrl/Cmd + Y
- Create Index - launches the Index Wizard
- Launch Book Settings - returns advisers to the Book Settings Wizard to edit and manage the project settings.
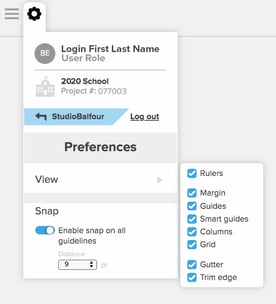
Settings Menu
Use the toggle switches in the settings menu to edit your page preferences.
- View – Use the toggle switches in the settings menu to edit your view preferences.
- Margin – displays the boundaries of the content area on each page.
- Rulers – displays the rulers on the borders of the Mainstage.
- Guides – adds guidelines to your spreads and makes it easy for you to align objects and keep spacing consistent across your project. Click in the ruler to create custom guides.
- Smart Guides – can help to control the distance an object will snap to the guide as it is moved.
- Columns and Grid – display of the columns and grids on the page if they have been enabled in the Book Settings Wizard.
- Gutter – the space between two facing pages of a full spread.
- Trim Edge – indicates the physical edge of the page. Objects that cover this edge will be cut in the binding process.
- Snap - Enables or disables the auto-alignment to guides.
- Distance controls how sensitive the snap to distance from the object to the guides is.
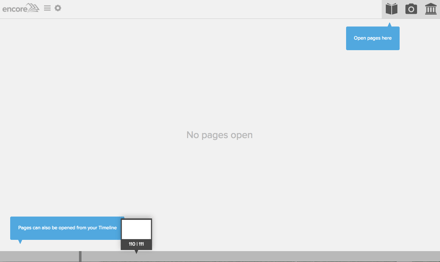
Page Navigation
You can open a spread either by clicking on the Pages icon ( ![]() ) or by hovering over the Timeline at the bottom of the Mainstage. The Timeline bar allows you to scroll through thumbnail icons of the spreads. Selecting a spread opens it for editing.
) or by hovering over the Timeline at the bottom of the Mainstage. The Timeline bar allows you to scroll through thumbnail icons of the spreads. Selecting a spread opens it for editing.
Page Manager
Clicking on the Pages icon opens a grid view of all the spreads in your yearbook. You can double-click on the thumbnail of an individual spread to edit it on the Mainstage.
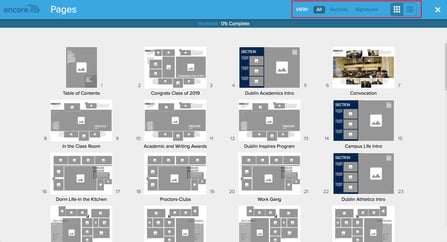
Click on the Sections view in the header to organize the spreads by sections. Advisers can reorganize, rearrange, and rename sections here and by launching Book Settings from the file menu.
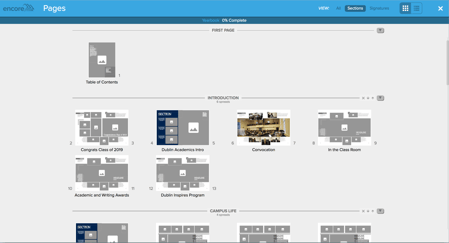
Click on the Signature view in the header to see spreads grouped into 16-page increments, called a signature. This view helps advisers plan to complete each signature for the printing of the book.

Page Manager List View
Clicking on the toggle switch in the top right area of the header enables the list view. Use this screen to filter spreads by page status, page number, spread name, due date or assigned user. Click on the caret icon (▼)
in the column header to sort the view by that category.
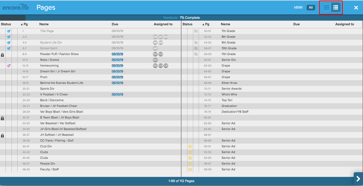
In this view, the columns on the far left indicate the status of that page with an icon.

Indicates a spread is locked or in use by another user.

Indicates a spread is completed by a student and ready for review by the adviser.

Indicates a spread is completed and approved by the adviser.

Indicates a spread is submitted to the plant.

Indicates that the spread has flowed portraits.
Opening a Spread
Double-click on any spread in the Pages view to open it on the Mainstage.
From the Mainstage, use the Timeline feature to navigate to other spreads in the yearbook by clicking on the thumbnail image. The arrows at each end of the Timeline enable quick movement from spread to spread.
Toolbars
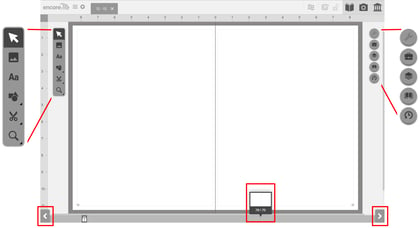
The toolbars on either side of the spread provide tools you will need to create, modify and edit the spread.

Click to initiate the Portrait Flowing Wizard

Click to mark the spread complete

Adviser has the option to force unlock a spread open by another user

While editing, the spread is unlocked to the user

Properties - customizes stroke, fill, filters, edges, rotation and other characteristics of objects on your spread (see page 16 to learn more about Properties.)
Pointer - selects objects on the spread
Photo Box - creates an image placeholder on the spread with click and drag of the mouse
Text Box - adds a custom text box to the spread with a click and drag of the mouse

Shape - draw customized lines, text boxes, or image shapes

Cut Ctrl/Cmd + X, Copy Ctrl/Cmd + C and Paste Ctrl/Cmd + V – manage objects on the spread

Zoom - adjusts the view for different screen sizes

Properties - customizes stroke, fill, filters, edges, rotation and other characteristics of objects on your spread (see page 16 to learn more about Properties.)
myContent - curate photos, graphics, templates and backgrounds for each spread.
Layers - add multiple layers to your spread and edit backgrounds.
Page Properties – error checking and change page number settings on a single spread.
History - tracks all the object changes that occur on a spread during a single login session.
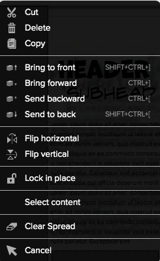
Right Mouse Menu - with an object selected, clicking the right mouse button displays additional options, including arrange objects and flip objects horizontally and vertically.
To copy and paste from another source, select and copy text (i.e. Microsoft Word document), then open spread and select text area to paste to. The first time you paste, click Allow in the Chrome pop-up window.